Setting up your e-mail channel
Wowdesk allows you
to designate an e-mail address to accept and load cases into Wowdesk from your customers. These
incoming e-mails are automatically converted to cases approved by your
support center administrator and will be sent to the appropriate location
based on the custom routing rules you define.
You'll need an e-mail address, password, and
e-mail host name and port number to set up this feature. If you don't know the
server address
and port, check the support section of your e-mail provider's website.
Once set up, you can view your incoming e-mail
information (including the date/time received and subject) on the Channels
feeds review page.
To set up your e-mail channel:
From
your left main menu, select Admin.
Select
Channels.
On
the Channels configuration page, look for the e-mail accounts box
and click Add.

On
the Channels Configuration e-mail Capture page, you can either create
a mailbox on our mail server "Default
mail server" or add your own mail server configuration
by selecting "User your own
mail server".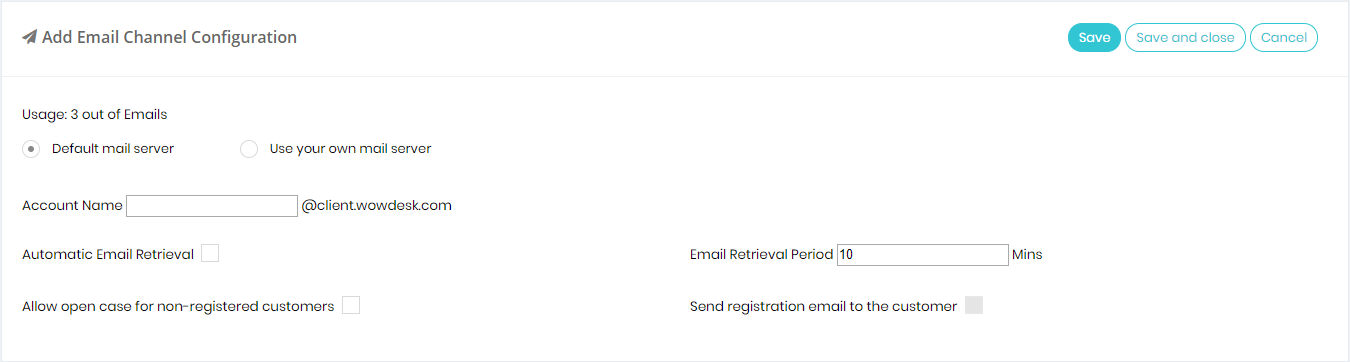
Add
Account Name if you will use
our mail server and the created mailbox will be like mailbox1@<your-sub-domain>.wowdesk.com.
Add
the following information for the e-mail address that will be capturing
incoming case information in case of selecting "Use
your own mail server" option:
e-mail address that you want to use as your
main support e-mail
address in the e-mail
Address field.
This will be your contact e-mail for all support issues via Wowdesk.
Support e-mail address password in
the e-mail Password
field.
POP3 server address for your incoming
e-mail provider in the Incoming
mail server field.
POP3 server port for your incoming e-mail
provider in the Incoming
mail port field.
SMTP server address for your outgoing
e-mail provider in the Outgoing
mail server field.
SMTP server port for your outgoing e-mail
provider in the Outgoing
mail port field.
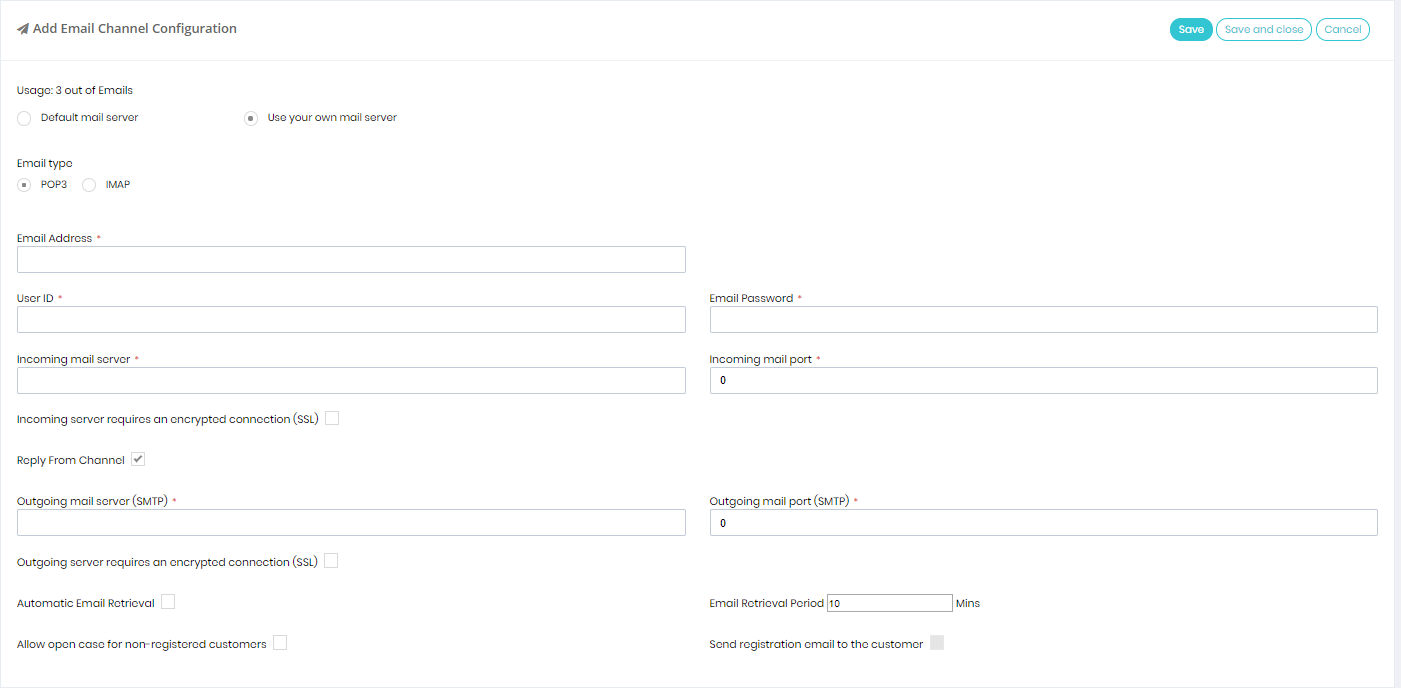
Check the "Incoming server
requires an encrypted connection (SSL)" box if your incoming
support e-mail address is using SSL protocol.
Check the "Reply from
Channel" box if you need to reply to the customer via
same support e-mail channel.
Check the "Outgoing server
requires an encrypted connection (SSL)" box if your outgoing
support e-mail address is using SSL protocol.
Check the "Automatic e-mail
Retrieval" settings, if you need to automatic open case
for the incoming e-mail on the channel.
Change "Email Retrieval
Period", if you need to change the default period of accessing
your channel.
Check "Allow open case
for non-registered customers", if you need to open cases
for the non-registered customers.
Check "Send registration
e-mail to the customer", if you need to send the customer
the login information to the portal to track the opened cases.
If you're entering more than one e-mail address, click Save and enter the page information
for the next e-mail address.
When you're finished, click Save
and close.
This e-mail address is now set up to capture incoming cases from customer
e-mails.
Once you set up your e-mail channel,
you can view your incoming e-mails (including the date/time received
and the e-mail subject line) on the Channels feeds review page.